Note: None of the contents of this article are meant to replace the advisement or care of a real medical professional. This information is for use solely in emergency situations where access to professional medical care is going to be delayed. This is not a long term life saving measure, just something to keep someone alive until they can reach professional medical help. The author of this article and the owner of this website will not be held legally responsible for any injuries or death that come as a result of your attempts to utilize this information.
How to Save a Life: Emergency Medical Techniques When Medical Supplies Aren’t Available
How to deal with a sucking chest wound using duct tape and a plastic bag
Maybe you’re reading this from a choppy internet connection that hardly ever works in your hooch in Afghanistan. Or maybe you’re reading this from the couch while eating a bag of potato chips with a re-run of Desperate Housewives in Wyoming. Either way, you’re currently wondering one thing: If my buddy gets a hole in his chest that penetrates into the lung, how do I save his life? Well, if you’re reading this from Afghanistan, that is a very good question. If you’re on the couch watching Desperate Housewives and feel the need to ask that question, you may want to take a moment to consider your life choices. Either way though, I’m going to tell you.
First things first, ensure that the situation is safe. It doesn’t matter if you’re performing this procedure on your buddy overseas, or on a stranger on the side of the road who was just in a car accident. Get yourself and the “casualty” to safety before attempting to perform any life-saving measures. Remember, you can’t help them if you’re lying there injured beside them. If you’re in a combat zone, get them to your hidey-hole before trying to patch them up. If you’re on the side of the road, make sure you are out of the way of oncoming traffic. I’m not going to say don’t be a hero, I’m just going to say being a hero is more enjoyable if you’re alive.
Next up, get help! Whether you’re dialing 911 on your newfangled iPhone or calling in a medivac report on the radio, you need to get the casualty professional help as soon as possible. Unless you’re a professional surgeon, in which case I’m wondering why you’re taking my advice on the subject. Remember the rule of the golden hour; if you get your casualty emergency medical help within 1 hour their chances of survival increase drastically. That doesn’t mean stop after 60 minutes, it’s an approximation.
Now it’s time to inspect your casualty. I’m not going to go over an entire trauma assessment here, which is an article all to itself. Just remember your ABC’s. Check their airway, breathing, and circulation. To check the airway and breathing, look, listen, and feel. Place your cheek down by your casualty’s mouth. Look for chest rise, listen for the passage of air, and try to feel their breath on your cheek.
While you’re doing your look, listen, and feel method, you hear a strange sucking noise coming from the casualty’s chest. Alert! Bad stuff is happening here and you’ve got to act fast. Lets switch to bullet points here to make this a little simpler to break down.
- If you’ve got a CLS/ medical kit, now would be the time to break that out. Having access to a pair of latex gloves not only prevents the spread of disease, but it can be a great occlusive dressing (it won’t let air or water through) in a pinch. If you’ve got them, put them on. Also, remember what occlusive means, we’re going to be using it a lot in this article. Plus it’s always good to expand your vocabulary.
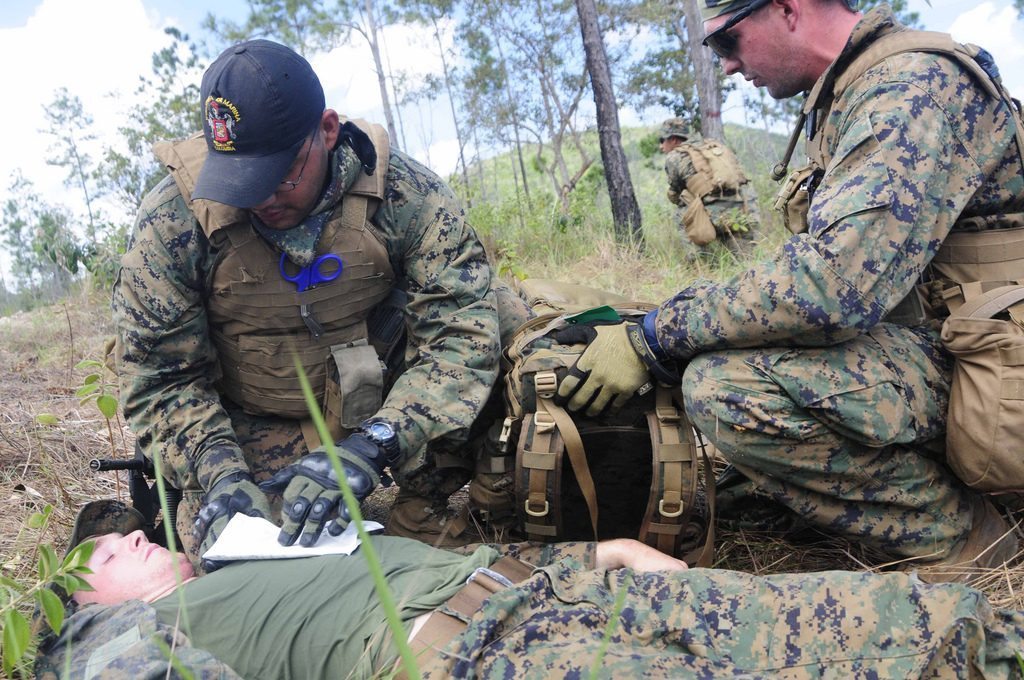
- Expose the area- You’ve got to see what you’re dealing with if you want a shot at saving this person. If they’re wearing body armor, open that up. If you’ve got a scissors, cut a straight line down the center of their shirt. A field knife will work too, but probably not as well as the scissors. If all else fails, tear it or just pull it up. Just remember not to jostle your casualty too much. They may have an impalement (something sticking into them), and any movement may move it creating further damage.
- Look at the area of injury- Remove any debris from the area that is obscuring your view of the wound. Now, if there is an open area of skin that appears to be sucking air in, you’ve got a sucking chest wound on your hands. The blood coming from the wound will likely be frothy, which is caused by air exiting the wound causing bubbles in the blood. If there is an object impaled through or into the casualty, your procedure will be different, but we’ll go over that in a separate article.
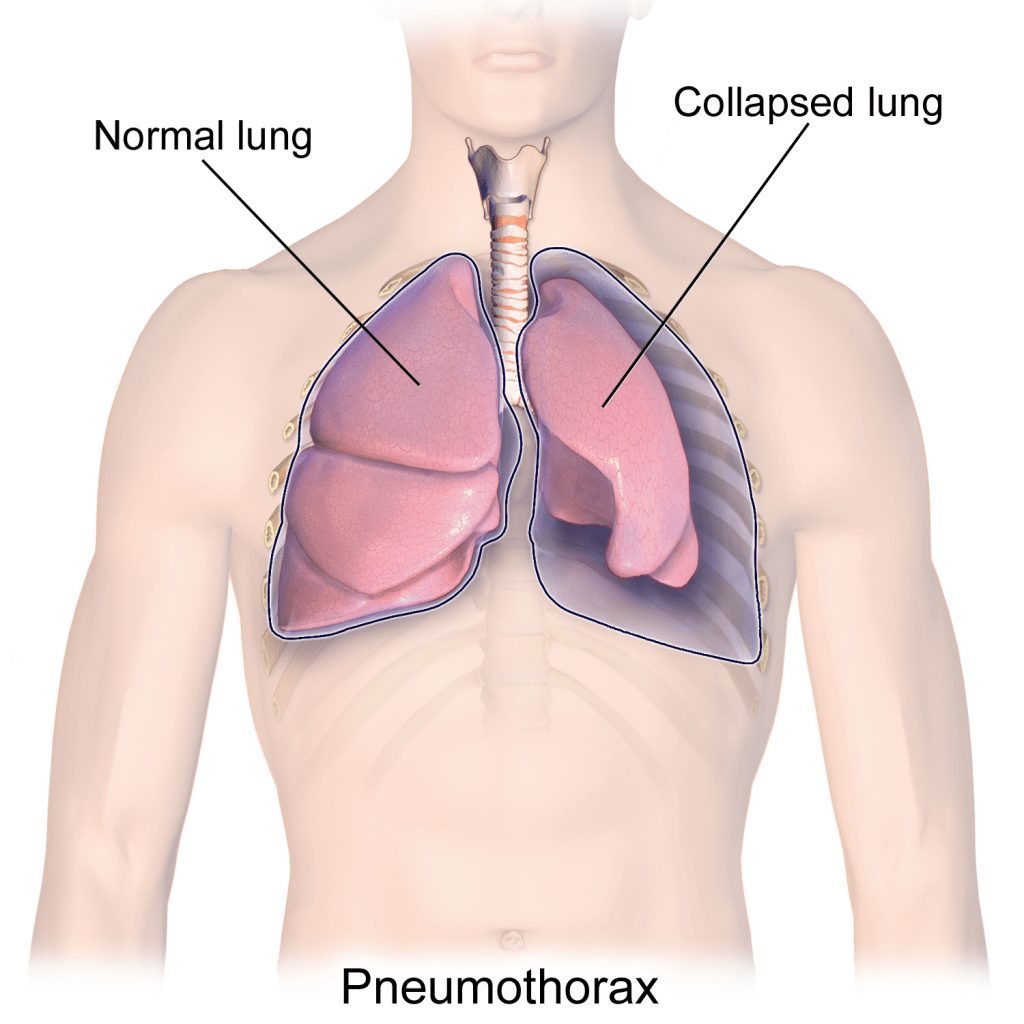
- Put your (preferably gloved) hand over the wound. Right now air is being sucked into pleural space surrounding the lung. This is putting pressure on the lung, causing your casualty to be unable to breathe. So try to make as airtight of a seal over the wound as possible to prevent any more air from getting in. Throughout the next few steps, keep your hand here as much as possible until you have the wound dressed.
- Do a quick check for an exit wound- Many of these types of wounds are caused by gunshots. Bullets have a tendency to keep going when hit things, so sweep your hands under the casualty to check if it came out the other side. If it did:
- The best thing you can do is find a thick occlusive dressing; something you can prop under them that their body weight will hold in place; you’re going to need to use your hands. An IV bag works great for this.
- When you’ve got this sealed off, go back to treating the initial wound
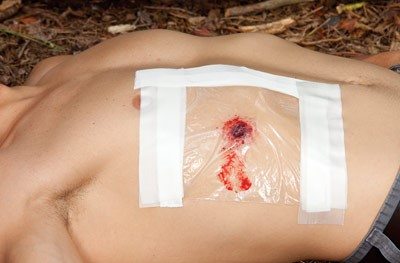
- Time to break out the duct tape (or even better, 100 mile per hour tape if you’ve got it). Tear off 3 strips that are slightly longer than the outer edges of your edges of whatever plastic piece you’re going to be using as a dressing. This isn’t an exact science, just make sure they’re longer than the plastic otherwise you’ll end up with an air leak. Update: paramedic school initially taught “tape on 3 sides” method. Recent research has shown that a completely occlusive dressing is now recommended.
- If you have a medical kit, take out one of the packaged longer bandages. You won’t need the bandage itself right away, but it’ll come in handy later. If you don’t have access to a medical kit, grab a plastic bag, or any other soft plastic you have nearby (it’s helpful if it’s relatively clean to prevent infection). If you do have the medical kit, open the package for the bandage being careful not to rip the plastic. Ensure that the piece of plastic (referred to as dressing from here on out) is at least 2” wider than the wound itself.
- Set the bandage aside somewhere that it’s not going to get real dirty. Then hold the inner side of the plastic package close to the casualty’s chest. Don’t touch the inner side, because it’s sterile and you want to keep it that way.
- If the casualty is conscious, tell them to exhale as deeply as possible. This helps get some of the air out of their chest cavity, and also makes for a better seal. When they are at their maximum exhale, place your piece of plastic over the wound. If they are unconscious, wait until you see their chest fall in their normal breathing pattern and apply the plastic dressing. Hold it down tight, making sure not to let any air pass through.
- Take your first piece of tape and place it along the upper edge of the plastic piece, ensuring you firmly attach it to their skin.
- While still holding the plastic dressing firmly in place, repeat this step with a piece of tape on both sides of the dressing. This should leave only the bottom side without tape on it. Oh no, you don’t have a piece of tape for the bottom edge! You failed! No, I’m kidding. I just like to bring a little levity to the situation. Please stop crying.
This open bottom edge is called a flutter valve, and it’s going to save their life. It does this through simple physics. When the diaphragm (the muscle that control breathing) contracts, it creates a negative pressure in the chest, which is what causes you to breathe air in. This negative pressure will pull the plastic dressing over the wound preventing air from being sucked in through the hole in the chest. When the diaphragm relaxes, air is exhaled. In this case though, it loosens the dressing allowing the excess air that was building up in the area surrounding the lung to escape. You’ve saved them! So seriously, please stop crying. We’ve still got some work to do.

- Once the dressing is firmly in place, hold pressure on it for 5-10 minutes to slow or stop any bleeding. Or even better, if the casualty is conscious, have them do it so you can keep working.
- If there was an exit wound on the back of their chest, it’s time to put a somewhat more permanent fix on that. Take another piece of plastic (or occlusive dressing), and put tape on all four edges of it.
- When you have it ready, have the casualty exhale deeply again, and hold their breath if they’re able. Roll them onto the injured side, and place the dressing over the wound in the back.
- Keep the casualty on the injured side. While uncomfortable, this allows the uninjured lung to work at full capacity, which will help make up for the oxygen deficit caused by the injured lung.
- Treat the casualty for shock, and continue to do a full trauma assessment to look for other injuries that may require your attention.
- Continuously monitor their vital signs, to ensure that your treatment is remaining functional.
- A few things to monitor for:
- Increased difficulty breathing
- Gasping for air
- Lips/ gums/ finger tips turning blue
- Trachea deviating to either side
- If you notice any of these things happening, quickly check that the edges to your dressings are holding properly. If they are not, do not remove them! Simply tear off another piece of tape and go over the first layer.
- If they have not come loose, you may need to do something called “burping the wound”. I didn’t come up with the term. This essentially means that blood has begun coagulating in the wound, preventing proper air flow. So what you do is insert your finger slightly into the wound (just a little bit, don’t go looking for their aorta here), and get out any dried blood that you can. Gross, I know; they’ll owe you a beer when they get out of the hospital.
- Get your casualty to medical help as soon as possible! Remember, this is meant as a short term lifesaving measure; it’s not a long term fix. Hopefully help has arrived by now, but if not the situation will determine if you can evacuate them yourself. Monitor their vitals the entire time until they have been handed off to the professionals.
That’s all there is to it. I highly recommend practicing the procedure a few times before going into any environment where you think it may be necessary (Note: when practicing, please do not cause a sucking chest wound to add an element of realism. Simply picking a spot on your buddy’s chest and saying, “Here’s a sucking chest wound” will probably suffice). Here’s a link to a video where you can see the procedure done that was produced by the Army. It’s old, but it should give you a decent picture of what to do.
I truly hope that you never have to use the information from this article; but if you’re ever in the situation where you do it’s always better to be prepared. Now, go forth, and save lives! (Did that sound a little contrived? Sorry, I didn’t really know how to end this. But it’s over now. Goodbye.)
- I have no idea if the proud residents of Wyoming are a large source of viewership for the Desperate Housewives re-run episodes. I simply used you as an example because you were the first state to pop into mind. Please don’t be offended, or sue me, based on my use of your state in my example. I’m sure you are a noble and graceful people, much like the antelope that grace your plains. Also, I have no idea if you have plains or, if you do, they contain antelope. Please don’t hate me.


