By Clay Pollack
Designing your riser:
Time to get creative! The riser is the inflexible center piece to your bow, and will be one of two artistic outlets you’ll have in this little experiment. There are plenty of riser handle designs out there on the internet, a simple google search will give you plenty with dimensions. There are some rules you’ll need to follow here though, so make sure to adhere to these in your design:
- Start with a rectangle drawn the length and width of your riser, and work within that only. You don’t want to design your handle and then realize the block of wood you made isn’t big enough for it.
- Leave a 3” block on each end for the limb attachment face. If you leave less, you may put too much stress on a small section of your bow limb which could lead to snapping, which is bad.
- No portion of the handle should have less than the equivalent of about 1 ½” sq of wood to support it. I don’t have any high-speed mathematical calculation for you here, but common sense rules. You don’t want to be putting 50+ lbs of pressure on a piece of wood you’ve whittled down to a toothpick.
- Put an arrow rest in your design. “But author,” you exclaim. Seriously, Clay, Clayton, buddy, Kmart shopper, take your pick. Quit calling me author, it creeps me out. “But Kmart shopper,” you exclaim, clearly not comprehending what it looks like when someone is being facetious in writing, “Rambo doesn’t use an arrow rest when picking off Burmese warlords!” Well, as we went over in the beginning of this article, you’re not yet Rambo, so you’re going to want one.
- Your riser length is the largest determining factor for deciding the draw weight of your bow after choosing what type of ski to use. Since the handle does not bend (only the ski limbs bend), the length of the handle is directly related with the energy it takes to draw your bow. The longer the handle, the shorter the limbs and the more energy it takes to bend them. An increased riser length will require a greater angle on your attachment face. Just don’t go too long with it, or your limbs will have to be too short and you won’t get a smooth draw, plus you’ll be putting excess unnecessary pressure on them.
- Have fun with it, but make sure that functionality is your primary concern. I personally like to make the handle fit exactly to my grip, so it’s easier to be consistent when shooting. If you’re adjusting your grip every shot, it’s going to be hard to shoot consistently.
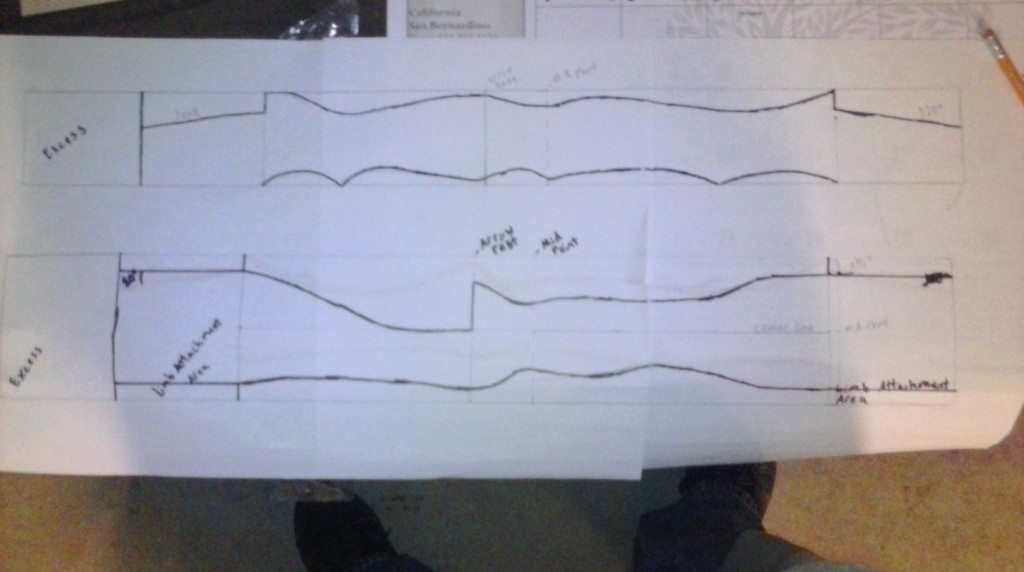
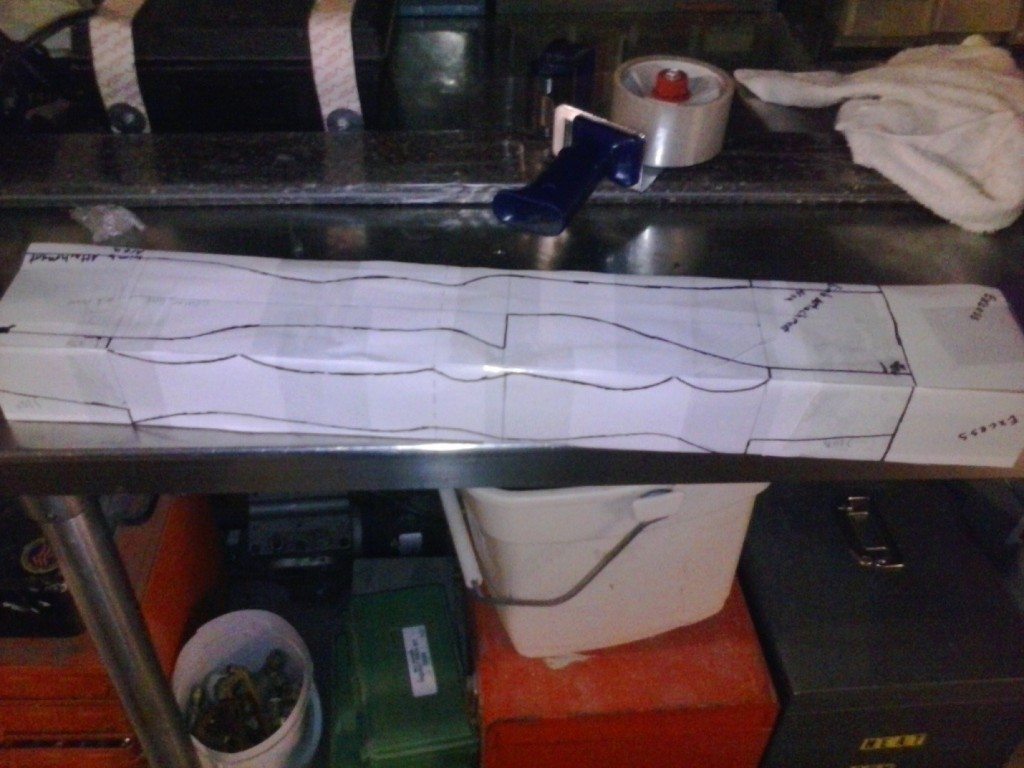
Other than that, go nuts! For the bow I made with this article, my brother-in-law wanted a snakeskin camo print paint job (I’ll be making a video tutorial on how to so this as well), so I looked up snakes with the colors he wanted and tried to make my riser design look something like them. Here are the drawing I came up with:
Since I have a less than optimal camera on my phone, you probably can’t see the measurements I have written on there. So, I’ll give them to you, but at a price. Okay, there’s not really a price, here they are. The overall riser length is 20”, the limb attachment faces (the areas at each end of the riser) are 3” long with a 15% angle of decline, the area between the base and midpoint is obviously 10”, from base to arrow rest is 11.5”. You want the arrow rest to be a bit higher than the midpoint because the area of highest stress needs to be where your hand is supporting it, otherwise you’ll have a lopsided bow when you draw. The limbs are 24” a piece. So when everything is put together (with the area of overlap), the overall bow length is 62”; which is perfect for my brother in law. These measurements led to a final draw weight just over 50lbs (I haven’t had access to the tools to determine precise draw weight, this is just what it feels like based on my experience).
This is a good point to determine your draw length. Your draw length is the distance between where you hold the bow, and where you release your arrow from. The easiest way to do this is to stand like you are holding a bow, with your non-dominant hand stretched out in front of you and your dominant hand at your chin. Then have a friend measure the distance between the V formed by your thumb and pointer finger of your non-dominant hand and your fingers at your chin. After determining your draw length, you can google how long your bow should be in relation to that. My draw length is 28.5” so for me a 62” length bow is perfect.
Once you have determined how long your bow should be, calculate how long you need each limb to be. The formula for this is: desired bow length-riser length/2 +3”= length of 1 limb. The +3” is to accommodate for the length of the limb attachment points. If you forget to incorporate this, your limbs will be 6” too short overall, and your draw weight will be increased tremendously.
Once you’ve determined this, measure that far down from the tip of your ski, and then measure the width of the ski at that point. This will determine how wide your riser should be at the limb attachment points. You can also measure the depth of the ski at that point, and draw it into your bow design to inset the limb attachment by that much if you want to have the limbs flush with the riser.
Cutting your skis-
Once you have determined how long you need each limb to be, measure that far down from the tip of your ski on both sides of the bow and mark it. Draw a straight line connecting those two points, and you should get a line going perfectly across the ski.
There are many different ways to approach cutting the skis. If you have access to a circular saw with a metal cutting blade, that is easiest. If you use a wood cutting blade, you risk damaging your saw and possibly injuring yourself in the process.
If you don’t have access to a circular saw with a metal cutting blade, you can use a bandsaw or reciprocating saw with a metal cutting blade. An angle grinder with the proper attachment on it will also work to get through those metal edges. If all else fails, it’s going to be you and a hacksaw. It takes a little time and effort, but you will make it. I believe in you; even when you don’t believe in yourself.
Perform those steps on the other ski as well, but double check the length of the first limb against the second before cutting. It’s better to sanity check just in case. Next, you’re going to want to cut in your string grooves.
Make a mark ¾” down from the tip of each limb on both sides. An angle grinder is going to be your best friend here, but if you don’t have one then you’re going to have to bust out the hacksaw. Cut through the outer metal edge with whatever you’re using at an angle going downward towards the back of the ski limb. Go in about ¼”, and make the divot about 1/8” wide. Then take a very small file to round the edges, otherwise it will wear on your bowstring and that could snap after a while.
Cutting the riser-
Once you have let the wood glue dry on your riser overnight, you are good to start cutting. Begin by ensuring that you have an even block of wood to start with. If you had any uneven boards in the beginning, cut that end off so you have a flat surface to work with. You might as well make this first cut at the length you want your riser to be, so you have a little less cutting to do later. Starting out with all flat surfaces and 90 degree angles makes this process much easier. My first attempt at making a bow like this I used a log of wood to start with, and I had no planer. I cannot even describe to you the frustration involved with trying to get any perfect angles and equal surfaces out of a log. Just imagine trying to footrace Usain Bolt with that same log of wood tied around your ankle, if you’re looking for a visual. If you have access to an automatic planer, now’s the time to use it! You want this block of wood as even as possible to get your angle measurements correct.
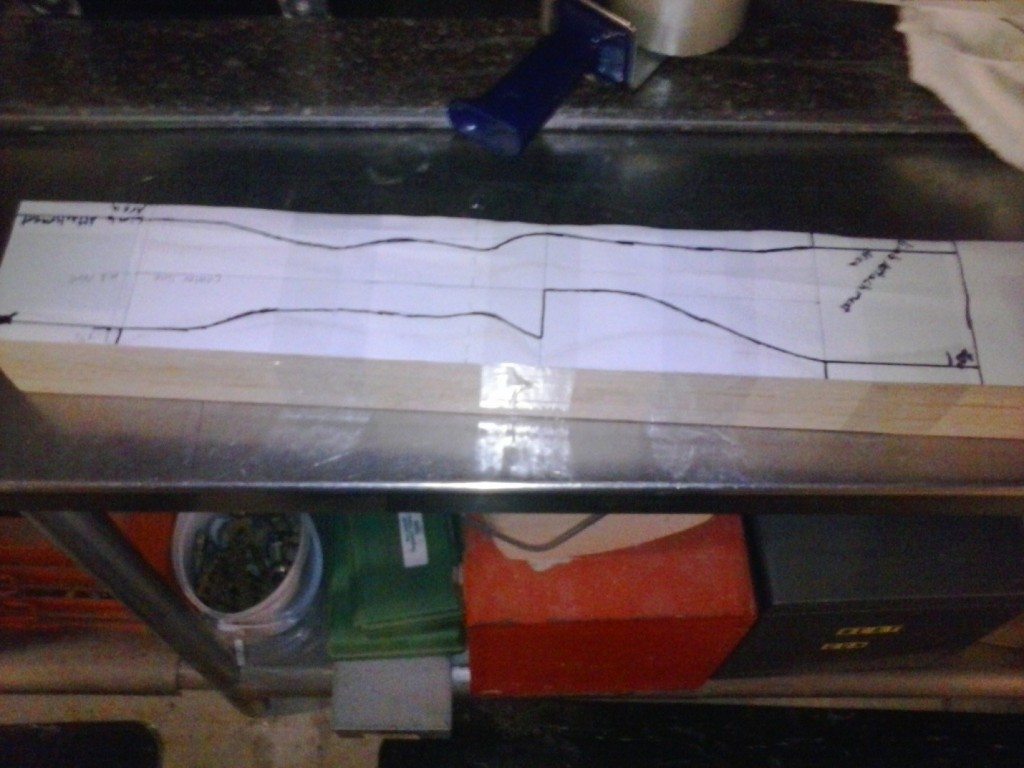
Once you have your block of wood, you can either glue your riser design drawings to it, or cover the sides of your block in masking tape and redraw your design on that (which I highly recommend). This is a great moment to do a sanity check. Make sure that you have your arrow rest on the correct side (it should be on the left if your are right handed), make sure neither of them are upside down, etc… I didn’t sanity check enough on this one, and ended up making cuts in to inset the limb attachments on the wrong side!
Anyway, once you have sanity checked, go ahead and glue them on. It should look basically like this:
I also made the mistake of using tape because I didn’t want to wait for glue to dry, but a lot of my design would come off one side while I was cutting the other. Either way you’re going to end up cutting off some of your design, but there’s a great way to get around this being a problem. I’ll get to that in a second.
While everything is still perfectly squared like this is a great time to work on those angles you need to get perfect. The main ones are your limb attachment faces, and your arrow rest. Use a protractor to get the angles perfect for your limb attachment face if you have one. If not, you’re going to have to do some math. This is the last determining factor for the draw weight of your bow. The degree of decline for the limb attachment face is inversely related to the draw weight of your bow. Essentially, if you have a larger angle of attachment, you’ll have a lighter draw weight on the bow. I went with 15 degrees for mine, which gave me a pretty good draw weight on the bow. I wouldn’t go more than 3 degrees in either direction from that, because you’re either going to have to stiff of a draw, or too loose.
Draw a line on the 3” of limb attachment area angled so they would be going towards you if you are holding the bow. If you are insetting the limbs to be flush with the riser, then inset this angle by the thickness of the limbs at that point. If you plan to do this, you’re going to need either a bandsaw or a reciprocating saw. If you don’t plan to inset the limbs and have access to a table saw, this process is much easier. Just put you block with the end flush with the guide on the saw, and set the angle of your saw to 10 degrees (or whatever angle you want). Then, sanity check to make sure it won’t take any extra off your block and cut.
Next, use your saw to make a cut at 90 degrees for your arrow rest. After that, all of the angles that you need exact are done! Huzzah! Sorry about that. Anyway, now it’s time to cut out your handle. Now the problem you’re faced with here is that when you’re cutting out one side, you’re going to be cutting your design off of the other. Here comes that hint I was talking about earlier. What you need to do is cut relief cuts into the wood. These are perpendicular cuts that you make in from the edge of your block to your design. I have mine drawn in here; all of the penciled in lines are where I made my relief cuts:
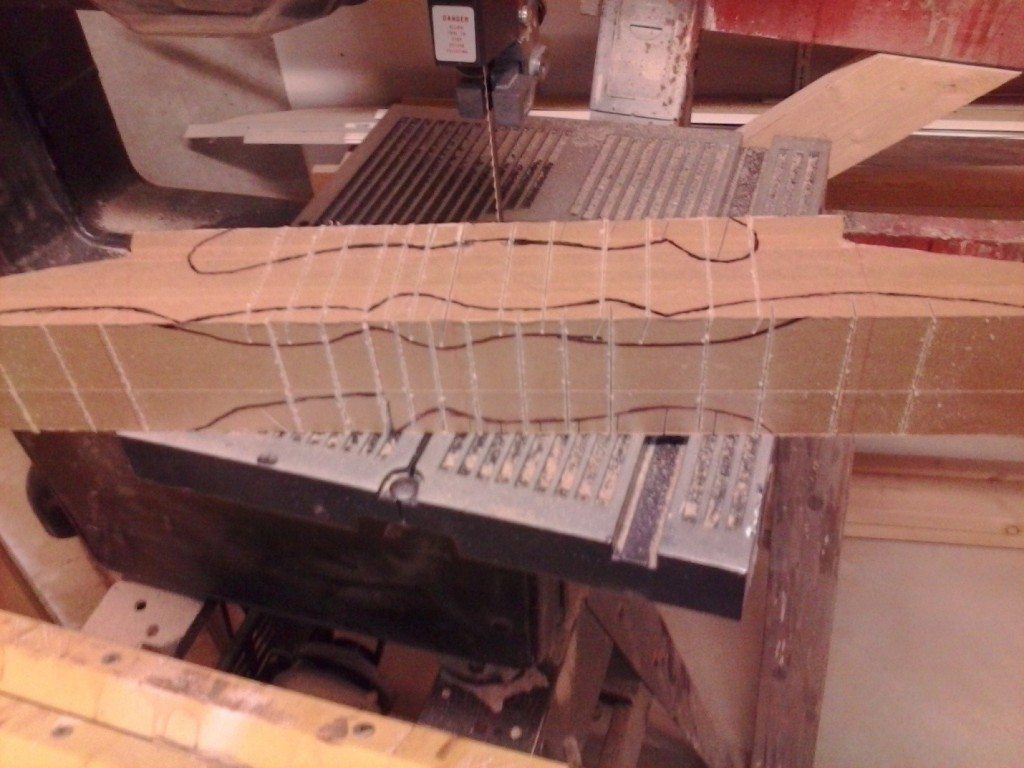
You should make them everywhere there is an angle change, and I wouldn’t go more than 1 ½” without one. Doing this serves a dual purpose: first, once you’ve cut off some of your design, you won’t be lost as to where to cut, and second, when you need to change angles, you saw blade won’t get stuck in excess wood, it will just fall away. Make sure not to saw in past the outer edge of your design though, or you will have less wood to work with.
Once you’ve made your relief cuts, cut along the outside edge of your drawing to get your basic handle design.
Forming your riser-
If you have access to a drum sander or belt sander, this is where you’re going to want to use it. If you don’t, you’re going to be working your wood rasp and file till your fingers bleed. This part is very much your own discretion of how you want your bow to look and feel. I like to form the handle so that my hand has one very natural and comfortable position for grip it, so that I don’t change my grip on the bow. Other than that, just remember not to take off too much wood so you don’t mess with the integrity of the bow.
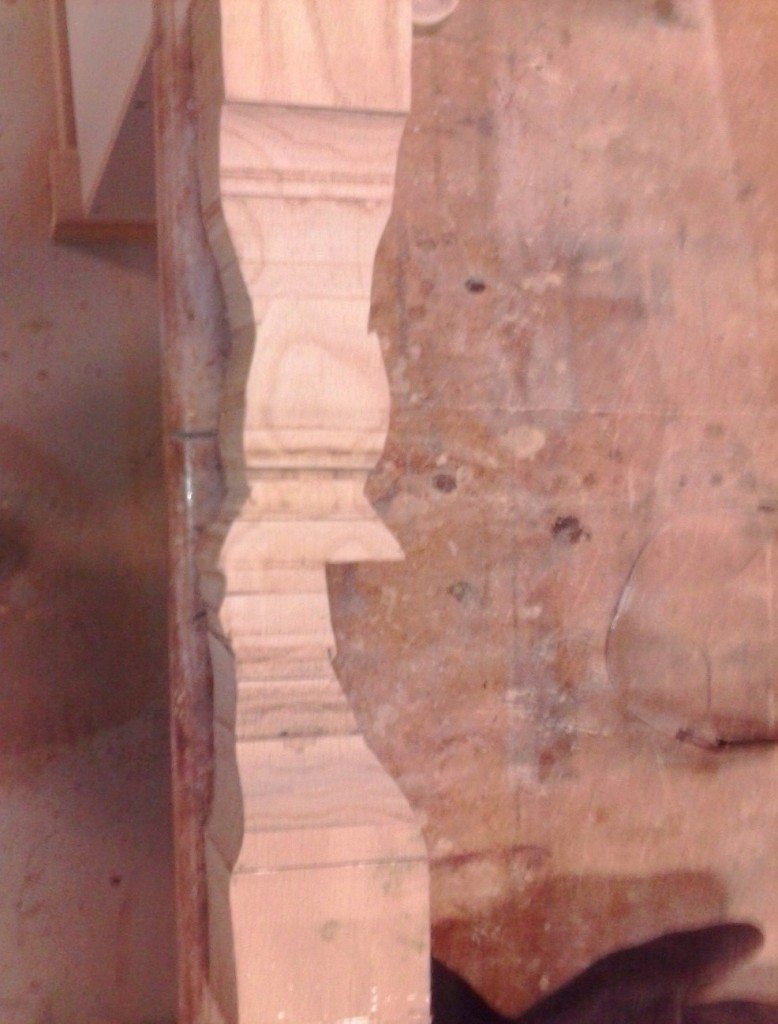
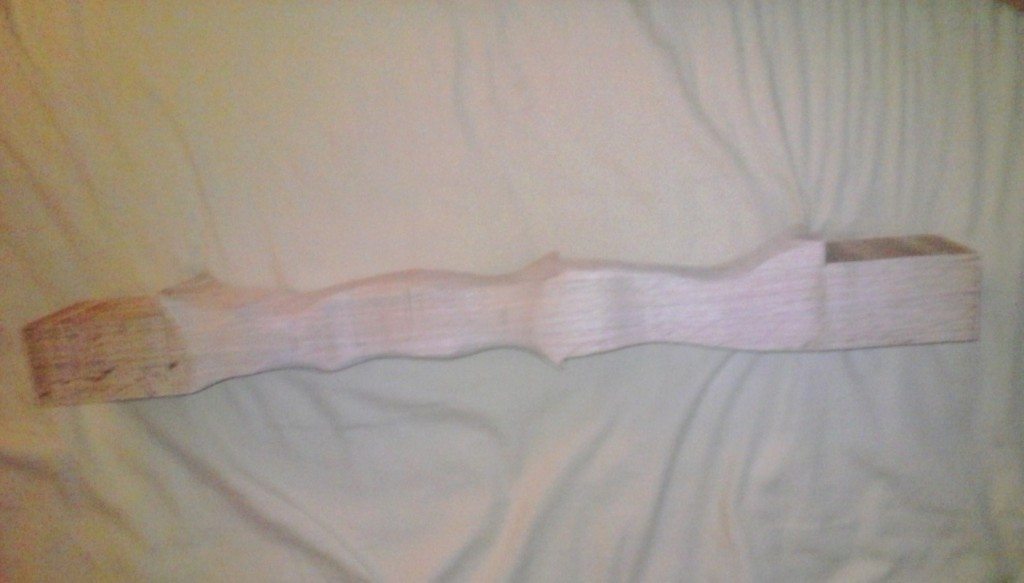
Once you’ve got your bow formed as much as you want it to be, move on to sanding. Start with a coarse grit sandpaper or sanding block, then move down on to finer and finer. If you’re just going to be painting your bow, you probably don’t need to get any finer than 100 grit, but if you’re planning to stain your handle, you’re going to want to get down to 220 (the wood should feel like glass when you run your hand over it. This is what mine looked like at this stage:

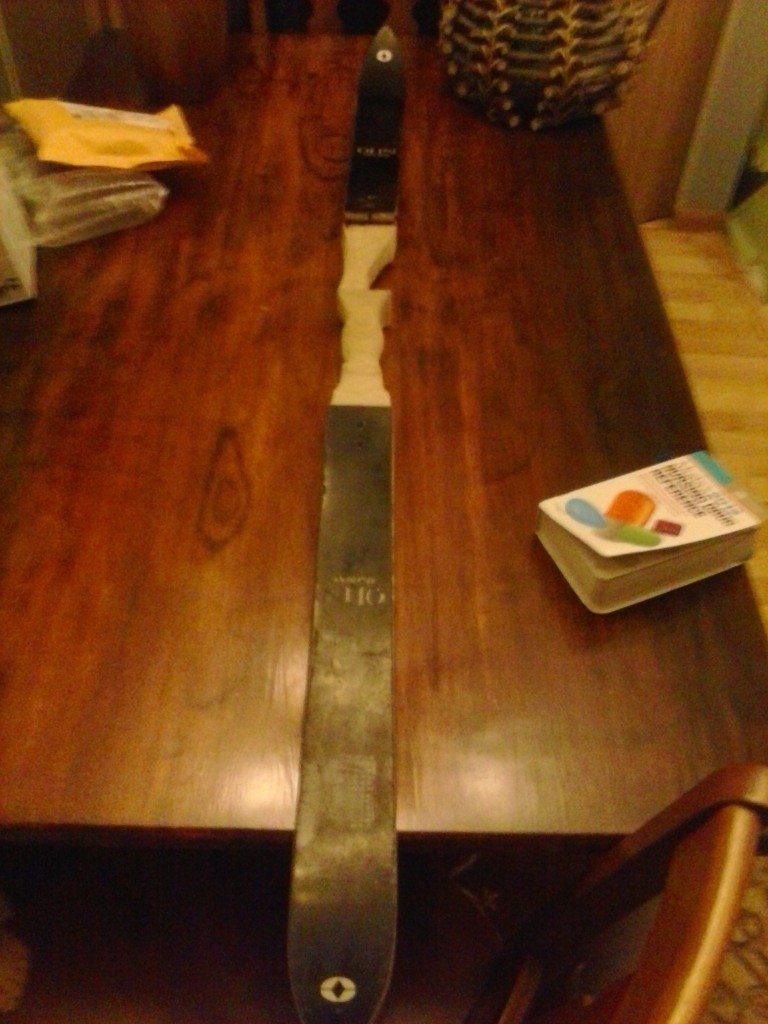
If you want to know basically what your bow is going to look like, you can rest the limbs on the attachment faces and lay the whole thing out flat.
