In this article we will discuss methods and techniques of escaping from unlawful restraint. Hostage taking and kidnapping have dramatically increased around the world. Many times it’s simply a matter of being in the wrong place at the wrong time. It can happen virtually anyplace and at anytime. Although the chances of the average person being taken hostage or kidnapped are small, it can happen to virtually anyone.
Some Basics
Surviving a hostage situation or kidnapping is to a considerable degree a matter of chance. It will vary with the type of captor and situation. The first 45 minutes of a hostage situation or kidnapping are generally regarded as the most dangerous. The more time that passes, the greater your chances of being released alive. If you’re to be used as a bargaining tool or to obtain ransom, you’ll be kept alive

The best opportunity for escape may take place at capture and while you are still in a public place. You need to be willing to incapacitate the threat if you’re unable to escape. If this is deemed too risky, make as much commotion as is safely possible to the draw the attention of others.
Be alert for any escape opportunities during transit. Many Third World kidnappers are highly organized with a network, including safe houses to deal with their captives.
Maintain a survivor’s mindset. Prepare before an incident occurs. Assess potential dangers and plan accordingly. Maintain situational awareness at all times and have an escape plan. Plan your evasion before attempting escape. When attempting to evade your goal is to get outside the hostile forces’ perimeter.
Escape Tools
Well-concealed escape tools are often missed during initial searches by captors and the captors will likely initially have less complicated and less secure restraints. They’re an insurance policy when traveling in high risk areas.
The most common method of restraint by bad guys is duct tape, followed by zip ties and cordage. Handcuffs are also common. There’s no way to know when you may be subjected to unlawful restraint by a criminal, crazy or terrorist.
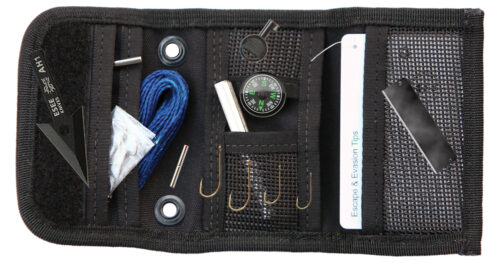
Discreet specialized tools and kits designed for escape & evasion (E&E) are available from a number of companies, as is training. There are also numerous YouTube® videos demonstrating various techniques that may be used.
Many tools and techniques may be employed to facilitate E&E. There are a number of purpose-designed escape tools that may be purchased, The more options that you have, the better off that you’ll be.
The two most valuable tools that you can have with you to facilitate escape are a handcuff key and a razor blade. With these two tools you can get free of most of the restraints you may be subjected to and they require little or no training to use. Of course, check the local laws.

Hiding Escape Tools
Carrying your tools in a container or pouch in a hostile or potentially threatening area is absolutely useless since they will be detected. Great for storage but definitely not so great for use on the street. Escape tools must be concealed in various locations on your body.
Concealments are limited only by your imagination. Lightweight low-profile tools can be concealed by taping them to various places on the body, clothing or footwear. They can be sewn into the lining of pants, shirts, or boots. They can be concealed under insoles of footwear or a bandage. They can be concealed under a VELCRO® patch or in a hatband.
When considering the concealment, access needs to be factored in. It’s important to be able to access necessary escape tools for defeating restraints while your hands are cuffed or bound, whether in front or in back.
Layering multiple tools in multiple locations will help insure that if one tool is lost, discovered or cannot be easily accessed, another tool will be available and accessible for use. It’s absolutely essential to practice and become proficient with escape tools and techniques before you actually need them.
Escape from Restraints
Positioning your hands with palms facing together. ideally in front of you, will make escape less difficult. Present your hands to your captor in that way when it looks like you have no other option but restraint.

Duct tape, zip ties, plastic/flex cuffs or cordage are easy to defeat if you know how. There are several different techniques that may be employed to defeat them depending on the type of restraint, including breaking and cutting. Zip ties and plastic cuffs may also be shimmed in a similar manner to metal handcuffs or melted with a cigarette lighter.
With a proper use of force you may break duct tape and the locking mechanism on zip ties and on most plastic cuffs. By raising your arms above your head as high as possible and then striking them down hard at your waist / hip, the applied force will break the binding tape or zip tie / plastic cuff mechanism.
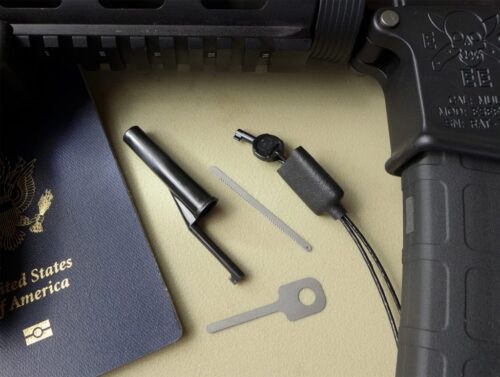
You may also cut yourself free from bondage by using a ceramic escape knife/ razor blade, micro escape saw, Kevlar® cord, or a diamond wire for cutting metal, all commonly included in an E&E kit.
Another and easy to find option is to simply use an inexpensive single-edge stainless steel razor blade from your local store for your escape blade. A single-edge razor blade works quite well for this purpose. Wrapping the blade with duct tape will help prevent getting cut when it’s concealed on your person.
The use of handcuffs for unlawful restraint is also not uncommon. Handcuffs are temporary restraining devices and have comparatively simple locks. There are several methods that may be used to defeat handcuffs, including picking, shimming (if not double locked), prying, and with a key.
Most modern handcuffs in the United States, Canada, Latin America and the United Kingdom utilize the same standard key. It’s sized to fit the common Peerless-style handcuff lock produced by many different manufacturers. There are handcuff makers that use different standards.
Maximum security handcuffs have a non-standard key and keyhole bushing for added security and pick resistance. An example is the Smith & Wesson® Model 104 used for high-risk prisoner transfers. It has a warded lock and smaller keyhole.
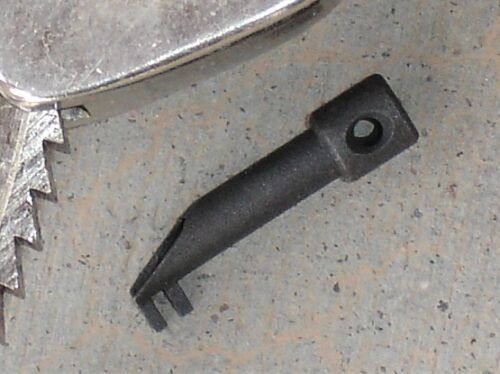
Although a standard handcuff key will work with the majority of handcuffs that you’ll likely encounter, for a more universal key you may wish to consider the Delta Handcuff Key™ from SEREPICK®.

The Delta Handcuff Key was developed to work on handcuffs with advanced security features. It features a full split that allows it to bypass the security pawl on ASP® High-Security handcuffs and Russian BRS, German Clejuso, Korean Yuil and other handcuffs that share similar keyways. It also works with traditional and standard handcuffs from Smith & Wesson, Peerless and others. The Delta Handcuff Key is easily concealed and weighs only one gram. It comes with a micro zip-tie for application to buttons, shoes, etc.
Besides using a key, the other techniques to defeat a handcuff are picking, shimming, prying apart and breaking the studs. Picking is the most difficult to learn and requires a lot of practice while restrained in order to learn how to be to do it. Picks can be fabricated from a variety of common objects.
Shimming is much easier and requires only the inserting of a shim between the ratchet teeth and the ratchet. Ideally you have a purpose-designed handcuff shim, but you can also use a bobby pin with the rubber tip removed (do beforehand) or even a tension wrench from a lock pick set. You’ll need a little bit of slack in the cuffs for this to work when they are on your wrist as the insertion the shim will initially tighten up the cuffs.
Shimming won’t work if the handcuffs have been double locked. Double locks can sometimes be disengaged by slamming the handcuff against a hard object but this isn’t easy to do and may cause radial nerve damage. Some double locks can also be defeated by pushing or pulling on the pawl with an object such as a hairpin.
Prying is accomplished by inserting something harder than the handcuffs, such as a seat-belt tongue for example, between the bows of a cuff and using leverage to pry them apart to break the rivets. This isn’t always easy and will likely result in injury to your wrist but it can get you free.
Another technique that may work is to twist the connecting chain until it binds on itself and then exert pressure against the chain until the studs connecting the chain to the wrist restraints break. The amount of force required can vary greatly depending on the handcuff and the amount of wear on the stud.
Escape from Car Trunks
If you’re locked in a car trunk, there are several means of escape. Unless the trunk has an inside trunk release, escape from a trunk can be difficult.
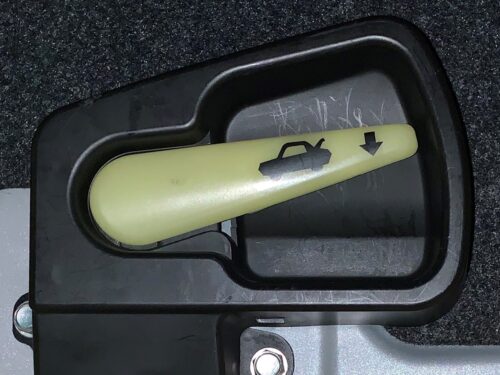
All cars manufactured after 2002 and sold in the US are required to have a trunk release inside the trunk. It’s typically a glow-in-the dark handle that you pull to release the latch. It may also be a handle that doesn’t glow, cord, button or toggle. If the car isn’t equipped with a safety release or the abductor has removed it, there are other ways to escape from the trunk.

If the car is equipped with a cable release that can be operated from iside the car you may be able to open the trunk by pulling on the cable. The cable will typically be on the driver’s side of the car. It may be on the floor or side of the trunk. You’ll need to pull up the carpeting or the cardboard paneling and feel for it to locate it. If you find the cable, you’ll need to pull towards the side or front of the vehicle to open the latch.
Another option is to pry open the latch or if this is not possible, pry up the trunk lid for ventilation or to signal for help. Tools may often be found in the trunk to accomplish this, such as a tire iron.
You may also be able to push out the brake lights. You may need to pull or pry off a panel to access them. Once you have access, you can pull off the wires and kick the break light cover off the vehicle and use the opening to signal to passers-by or the police by waving your hand or foot out the hole. If you cannot remove the lights, disabling them may cause the vehicle to be stopped by the police.
If the abductor(s) leave the car and aren’t around, many vehicles will allow you to escape through the backseat. Although the backseat release is generally in the passenger compartment, some vehicles have a release in the trunk. If not, you’ll have to push, kick or pry the seat down.
Summing Up
Being taken hostage or kidnapped can happen to anyone. Preparedness is about preparing for possibilities not just probabilities. Simply having the tools is not enough. You need to have the training and practice in how to use them.
Sources
ESEE Knives www.eseeknives.com
SEREPICK www.serepick.com
Material Disclosure
I received this product as a courtesy from the manufacturer so I could test it and give my honest feedback. I am not bound by any written, verbal or implied contract to give this product a good review. All opinions are my own and are based off my personal experience with the product.
*The views and opinions expressed on this website are solely those of the original authors and contributors. These views and opinions do not necessarily represent those of Spotter Up Magazine, the administrative staff, and/or any/all contributors to this site.
