

This is the third article in a series about miniature red dot optics on pistols. Click here for the previous article, or click here to go to the beginning.
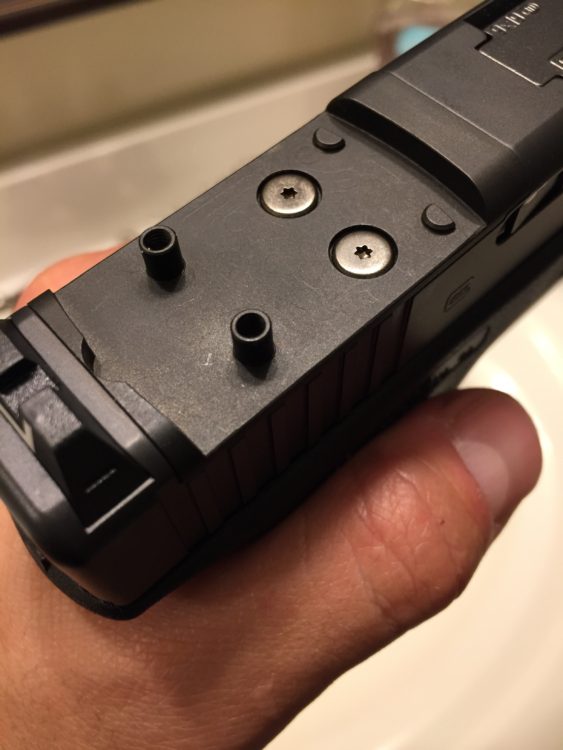
As i mentioned previously, i plan on starting with the Shield RMS as a learning tool, and to use in competition, and then want to mount the Trijicon RMR on my carry gun once I’m comfortable with my abilities shooting a red dot. So my first step was to get the Shield RMS on my Glock 17 MOS. Luckily, Shield Sights offers a specific mounting plate for the RMS to supplement the various mounting plates that come with the gun itself. The mounting plate comes from Shield with the screws to install it, and also has both recoil bosses and raised screw channels, which should ensure that the optic stays secure under recoil as long as its installed properly.
The Glock MOS variants are actually an innovative design, which is kinda of shocking coming from Glock. The ability to easily and quickly swap multiple different types of miniature red dot sights onto your pistol is very appealing for those of us who aren’t ready to be married to one specific red dot sight, or who maybe just want to play with different sights for fun.
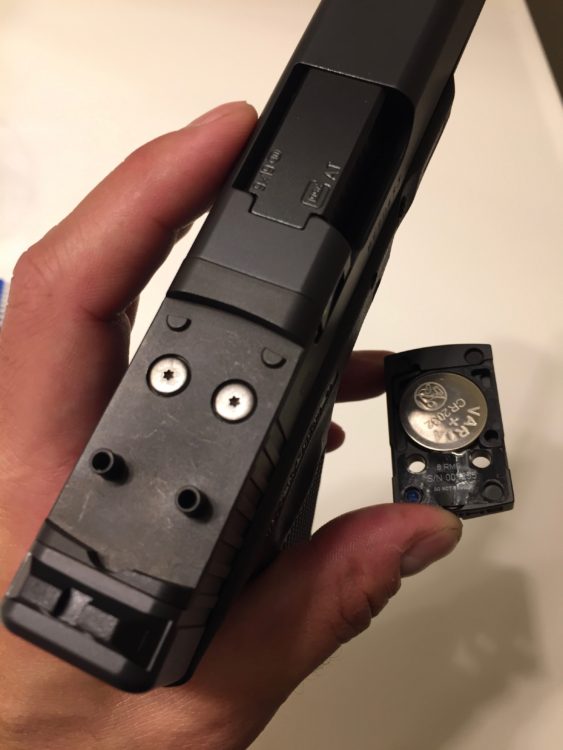
Mounting the optic on the MOS proved to be an easy process. I made sure the optic, plate, screws and channels were all clean, then secured the mounting plate to the slide using blue thread locker. Once the plate was secure, i put the battery in the RMS and placed it on the plate where it fit nice and snug with no play.
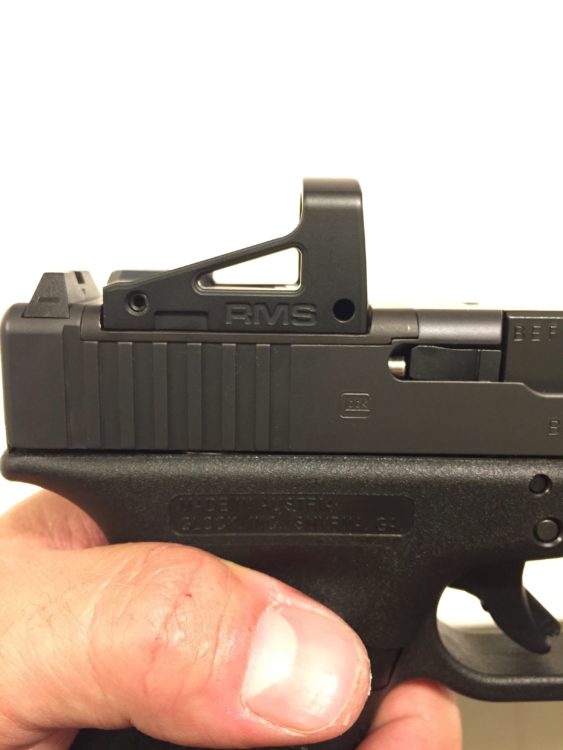
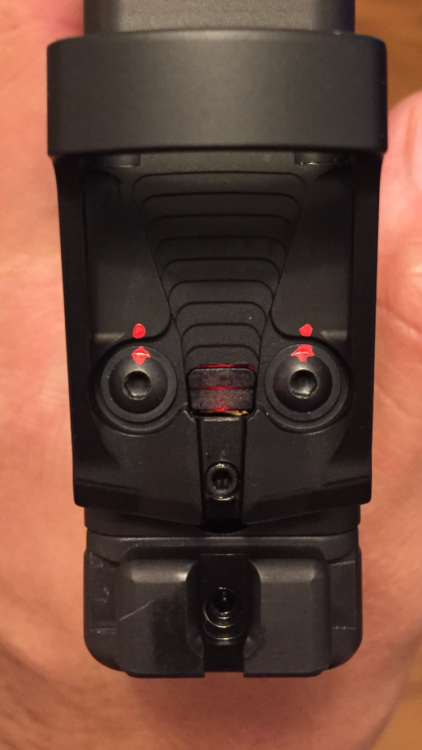
Next i secured the optic to the mounting plate and slide using more blue thread locker. At this point i added some witness marks to the screws on the optic to ensure that i would notice if the screws start walking off under recoil. I also added some blacked out Dawson Precision standard height sights in order to clean up the sight picture. I could have probably just taken a paint pen or sharpie to the Glock factory sights to save a little money, but i still wanted decent iron sights in case the optic failed while i was using it; (At the time of this writing, about 1000 rounds in, the optic has not failed and the screws have not come loose).
Now that i had a red dot mounted properly it was time to take it to the range and zero. Before i got to the range, I naturally spent some time dry firing and practicing my presentation from low ready and from holster in order to see how well i could bring the gun up to my line of sight and pick up the red dot. It was enlightening to see how much the dot moved around while i was holding my sight picture and dry firing, and immediately became apparent that using the dot will serve to highlight the deficiencies in my pistol fundamentals more than iron sights.
I did a little research on how to zero a miniature red dot on a pistol and headed to the range. Here are a couple different methods from Aaron Cowan and Scott “Jedi” Jedlinski.

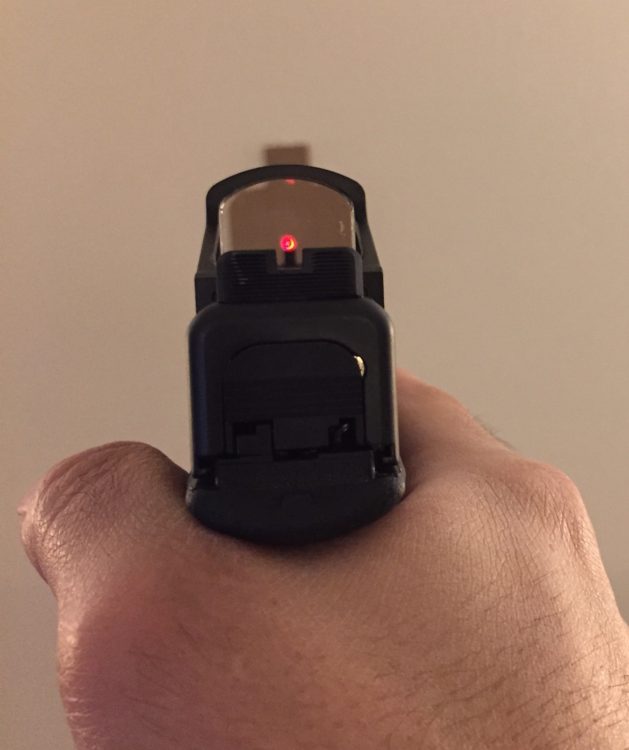
To my delight, as soon as i took the first few shots with my new red dot equipped pistol, i knew i was going to be a fan. The simplicity of the sight picture, and the ease of understanding where my bullets were going to hit just immediately clicked for me. I ended up choosing a 25 yd zero with the red dot essentially co-witnessing with the tip of my front sight post, barely just “dotting the I”. At this zero, the pistol shot point of aim/point of impact at 10 yards, and i was able to punch one jagged hole in the paper easily. The dot definitely seems like it makes it easier for me to shoot CONSISTENTLY. This is something i will address more in a later article.
The next step was to learn how the red dot appears when i present the gun in front of my eyes and how it reacts under recoil. My fundamentals play the most important role in how fast i can get on target, and how well i can make follow up shots and transition between targets. Ive read that people often have a hard time initially finding the dot when they bring the gun on target, and that was something that i wanted to immediately begin to train on. The goal being to focus on the threat/target, and be able to simply bring the gun up to your eye level and immediately see the dot. Some shooters say to use your front sight post as an index, which may help at first, but that seems like simply using the iron sights to aim and i want to be able to ignore the irons and just superimpose the red dot over what I’m looking at. This means to me that i need to get good solid reps in presenting the gun from holster or low ready until i bring the gun onto target instinctually and the dot just appears. I have some work to do on this as i haven’t been shooting Glocks exclusively enough to really be where i want. The grip angles of various other handguns are different enough that it can throw off your natural pointing of the firearm and how the sights line up.
In the video below I am evaluating where the deficiencies in my fundamentals are and seeing what kind of speed and accuracy i can achieve during rapid strings and target transitions. Generally I’m an average shooter, but my goal is to get better and rank up in USPSA Carry Optics division. Of note, i currently hold an A class ranking shooting rimfire Pistol Open, which is essentially like shooting a video game gun since the recoil is almost nonexistent, however certain aspects of the fundamentals of sight picture, target transition and trigger control should apply to carry optics nicely. Shooting a centerfire handgun requires very good recoil control which is primarily provided by a good solid grip with the support hand and the primary hand. In the video below you can see that one thing i need to work on is eliminating unnecessary upper body movements.
There is some great information on red dot equipped handguns out there, i enjoy Aarons Cowans methods of evaluation and his detailed explanations, and he covers many topics in depth with multiple videos so i will likely keep sharing his stuff here. Below he talks about developing point of aim with red dot sights on handguns, which ties in nicely with what i discussed above.
Here is another video where Aaron discusses speed and efficiency with red dot equipped pistols at close distances compared to irons:
Up Next: First USPSA Carry Optics Match!

I have a GEN 4 Glock 19 , I had the slide milled for a vortex Viper 6MOA with black rear and white front night sights by Ameriglow and I am having trouble zero wing the vortex Viper. Mostly because the Viper does not have clicks like other or Red dot sites do, FYI the company that did my slide work was Mapleleaf firearms.com out of Texas he does amazing work, in case you guys were curious!?? I cannot seem to zero because I am not 100% sure the vipers windage clicks and what they are equivalent to!?? I am also having trouble mounting it because the screw threads are different… I was wondering if anybody could help me with this issue? So basically I need to know how to mount it correctly should I use Loctite? Because the locking screws or behind the rear site, which is really dumb I thought about drilling two small holes in the rear site but I think I wouldn’t mess it up. How do I zero mount and co-witness… These are the issues I really need help with so if anyone has suggestions please let me know. Thanks in advance, and as always God bless and safe shooting
Hey Ryan,
Definitely do NOT drill any additional holes in your sights. The company who milled your slide should be able to tell you the best method of securely mounting the optic to your slide, and possibly would have provided the correct screws to use. You may want to contact them with your mounting questions.
I don’t have personal experience with the Vortex Viper red dot, but you should be able to find some great information on Youtube about how to properly zero your optic and cowitness with your irons.
Josh