
In 1954 Eugene Stoner and ArmaLite brought forth on this continent a new rifle, conceived in aluminum alloy, but not totally dedicated to the proposition that all were created equal, in particular: lefties.

On AR-15’s, efficient manipulations are particularly important. What is the use of all that firepower and inherent accuracy if we waste time fumbling with it? What’s more, the type of manipulations can change depending on the shooting activity. If your weak arm is tied up in a sling because you’re at Camp Perry, you need a different set of manipulations from someone proned out behind a bipod supported precision AR, which is different from someone running a carbine in unsupported positions. With the goal of simplification in mind, we want to keep as much commonality as possible between these techniques.
Why should we be concerned with all of these manipulation techniques anyway? In the words of the late, great Bruce Lee: “Simplicity is the key to brilliance.” Simplifying techniques increases their efficiency. By increasing efficiency we reduce fumbling and develop smoothness, smoothness becomes speed and speedy manipulations give us more time for marksmanship.
I once had a concealed carry student with over 40-years of firearms and shooting experience including 2 combat tours in Vietnam. When it was his turn to shoot, he picked up his 1911 in his shooting hand, flipped it over and placed the slide in his non-shooting hand, mag-well up. He then used his strong hand to retrieve and partially insert the magazine, smacked it sharply like Magnum P.I. to seat it, flipped the firearm over into is strong hand to rack the slide, then adjusted his grip several times before finally presenting the firearm on-target. These manipulations took approximately 30-seconds. He then proceeded to empty the magazine at the target in approximately 7-seconds, scoring 2 hits on paper and 6 new holes in my backstop. This individual is generally not a poor marksman, but in this instance he rushed his shots. His assumption, which is a common one, is that we must shoot faster than our opponent because the first one to land rounds on target is most likely to prevail. The conventional wisdom on this is that we don’t need to shoot faster than the bad guy; we need to shoot better than he does (which is defined by both speed and accuracy, by the way). How do we do that exactly? We spend less time physically manipulating the firearm, which gives us more time for the proper application of marksmanship fundamentals.
If this student had spent only 7-seconds on smooth, efficient manipulations of the firearm and 30-seconds on marksmanship, his total time wouldn’t have changed, but he would have saved almost 4-seconds per shot… plenty of time for accuracy, even for most novices. So…what’s the difference between 8 shots in 37-seconds with only 2 hits and 8 shots in 37-seconds with 8 good hits? The difference is mechanics, or efficient physical firearm manipulations.”
With that, there’s a whole lot to write about with these, so let’s jump straight in:
The AR-15 has 5 primary user inputs: trigger, selector switch, magazine release, bolt catch, and charging handle. I am deliberately not including the forward assist device because they can cause more harm than good and some rifles aren’t equipped with them. That’s controversial, I know, but it is consistent with my training and experience with these rifles. If you like using them, you are entitled to your opinion.
TRIGGER
Not much to say about AR-15 triggers from a left-handed perspective, they are centered in the rifle and equally accessible from either side.
SELECTOR SWITCH
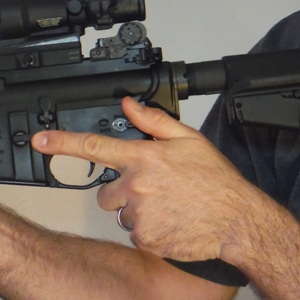

If you don’t like using the trigger finger that way because you’re afraid of a negligent discharge, that’s your prerogative, you can use the bumpy part of the back of the trigger finger again to brush it back and up. Hardcore southpaw that I am, I don’t generally advocate doctoring up guns with a bunch of what they typically call “ambidextrous” parts, for reasons already explained. That said, I strongly recommend updating your rifles with a quality “ambidextrous” safety. If not for you, do it for the poor lefty sap who may need to use it to finish his gunfight with your rifle… after all, he might be on your side. The weak side of bilateral safeties is that the switch on the right side of the receiver is held in place with a screw that can loosen. Use some blue loctite on it and check the screw tension periodically.
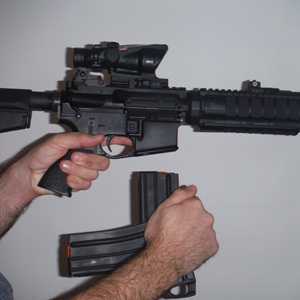
MAGAZINE RELEASE
The magazine release on AR’s is specifically made to be activated by the right trigger finger for “standard” shooters. Lefties have a few options on how they do this depending on the situation.
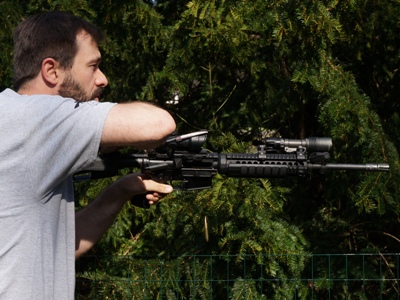
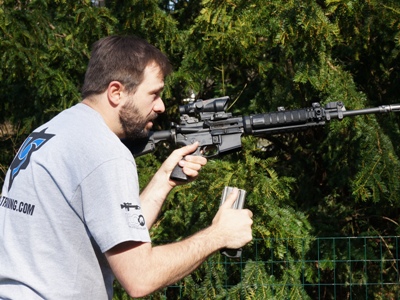
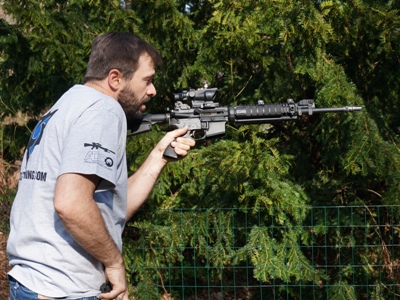
“Emergency” or “Speed” Reload – This is a reload situation brought about by the magazine running empty and the bolt locking back. Some instructors advocate bringing the rife out of the shoulder and into a “workstation” position, similar to the way we do with a pistol, while performing reloads. If you have a heavy barrel and/or if you like to mount flashlights and sound suppressors and other heavy stuff on the rifle, it can make it more difficult for some people to hold the rifle up this way with just the pistol grip. The leverage just isn’t in your favor. As a lefty, I recommend keeping the rifle in the shoulder with the muzzle between you and whatever you are shooting at for the majority of these manipulations.
“Tactical” reload – this describes a situation when you have a round in battery and an unknown number of rounds remaining in the magazine, coupled with time, opportunity, cover and a compelling need to insert a fresh magazine. People will be arguing the practicality and applicability of tactical reloads until metallic cartridge firearms are made irrelevant by laser weapons or at least until we collectively run out of ammunition and have to start throwing rocks. If you don’t believe there is any utility in tactical reloads, fair enough, you can skip this section and best of luck to ya!
For everyone else, I would have you consider these 2 methods:

Some people vary this technique by stowing the original magazine first, then inserting the fresh magazine. Neither variation of this technique gives me warm fuzzies. In the first case, I don’t like searching the ground for a magazine that I discarded, that may be lying in a pile of previously discarded empty magazines; it takes one’s attention away from the more pressing matters at hand. I dislike the second variation for the reason that it is too physically close to a speed reload, and we don’t want to start training muscle memory to retain empty magazines inadvertently. Also, we spend a lot of time with only one round in the rifle to defend ourselves with if we get suddenly interrupted.
#2 is the technique I prefer, which is to:


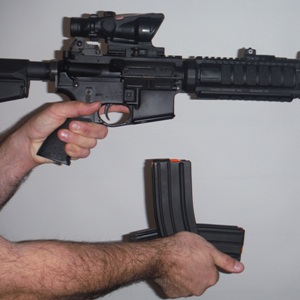
Once the new magazine is seated, we can leisurely stow the old magazine, as the rifle is ready to fire
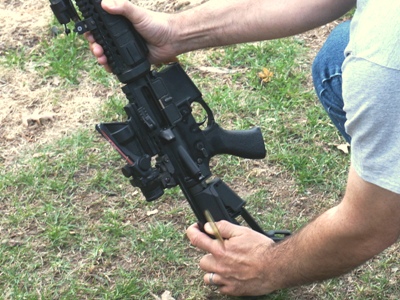
BOLT RELEASE
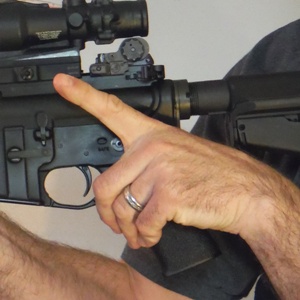
The bolt catch actually performs both as a catch and release on the AR. Southpaws should move the right hand to a magazine well grip and depress the lower side of the bolt catch with their right middle finger while retracting the charging handle with the left hand if we wish to hold the bolt open.
Some have argued that one should always close the bolt by running the charging handle, not by depressing the bolt catch, as running the charging handle compresses the recoil spring more, which gives the bolt more closing power. While the physics behind the spring compression are correct, there is a problem with this. If we use the charging handle to release the bolt, the bolt must drag the charging handle back into the receiver as it shuts. Under normal circumstances this isn’t an issue, but if you have a very dirty, sandy or wet rifle, or if it is very cold and your lubricants are getting waxy (in which case you also might consider a different brand of lubricant), these factors can slow the bolt down, preventing it from closing completely. The forward assist mechanism was added to the M-16 A1 to solve this problem, and is about the only time it would be useful, but it also adds a step and additional manipulations. Not to mention, I once watched someone use the forward assist to almost blow a really nice Noveske rifle sky-high because of a squib load that left a projectile lodged in the leade. When they tap/racked, the next round wouldn’t feed and they attempted to close the bolt by repeatedly slamming the forward assist. Fortunately, the class instructor stopped him and when he ejected the round he was trying to force into the chamber, the projectile had been pushed into the casing almost to the tip. For that reason, I don’t recommend using the forward assist and I do recommend using the bolt release, as Stoner originally intended, to close the bolt when it is locked back.
With that in mind, I recommend lefties use one of these 2 ways to close a locked-open bolt:

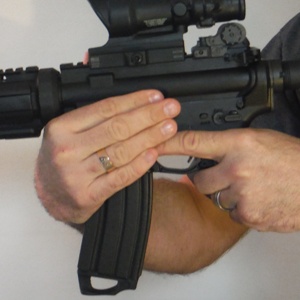
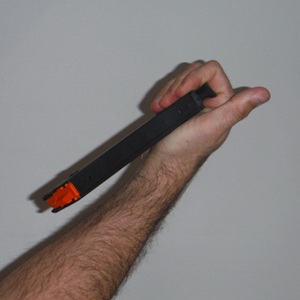
CHARGING HANDLE
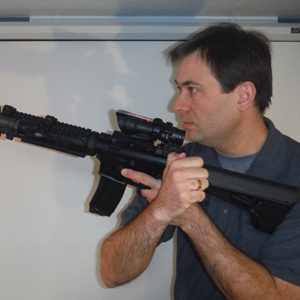
The charging handle is the Achilles Heel of the AR-15, whether you’re right or left-handed. I’m not sure what the original intent of the current design was, but it seems that it was meant to be operated by hooking the index finger on one side and the middle finger on the other. Conventional right-handed training doctrine favors pinching the left side of the charging handle between the left thumb and the knuckle of the folded index finger. This places uneven stress on the charging handle and can bend and eventually shear off the roll pin that holds the latch in place. Adding an extended latch can speed this process because it adds leverage. The BCM charging handles (for example) are designed specifically to prevent this, and their medium-sized latches promote easy manipulation without increasing the risk of snags. If you’re left-handed, I recommend you look at an enhanced charging handle, such as the BCM or a PRI Gas Buster. Recently, a few companies have been releasing high quality charging handles with bilateral latches. I applaud this, but I don’t currently use them because I would be training my muscle memory to be applicable only on a limited percentage of rifles so equipped. That’s a personal choice, I don’t blame you if you are a lefty and want to outfit your rifles with these, it would make life somewhat easier.
For those of us who don’t want to go with a bilateral charging handle, I have a few potential charging handle operation methods for you to consider, but a word before we continue…
Some folks have a stubborn mentality that we shouldn’t release the pistol grip to manipulate the rifle – ever. That is easy to say if you are in the right handed 87%, (but watch any of them run an AK and you will see them release the pistol grip to manipulate the safety). Look, if you have to run the charging handle, it means the rifle isn’t presently capable of firing. If the rifle isn’t capable of firing, whether that is caused by an empty magazine, a malfunction, or an open bolt, having our paw on the pistol grip gains us nothing. That being the case, what is the great sin of removing the firing hand from the pistol grip of a rifle that can’t fire? …and if that is such a crime, why is it OK to remove the hand from the grip of an AK to disengage safety? Oh, because the rifle won’t fire with the safety engaged, you’re right-handed, and that is the only way to do it? I see… Keep that in mind as we describe the following manipulations:
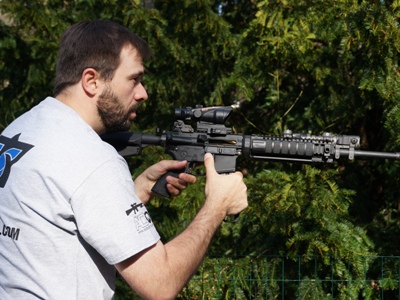
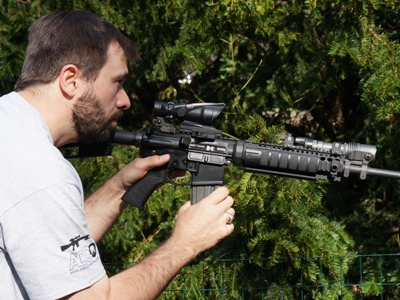
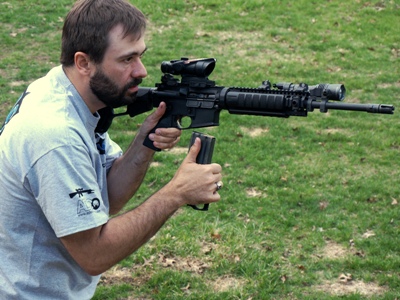
The first option and my personal favorite for running the charging handle starts with the butt of the rifle in the shoulder:
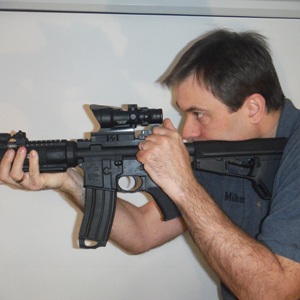
This way has several benefits: it is fast, it is strong, and it keeps the rifle pointed at the last known threat. The downside is that since the only reason to run the charging handle is to load the rifle, clear a malfunction, or administratively unload the rifle, your support hand will not be on the hand guard as shown above, but probably in a mag-well grip. That changes nothing. The other drawback to this technique is that if you do it in a tacti-cool class, your right-handed instructor will lecture you about maintaining the firing grip on the rifle, which takes us to the next techniques.
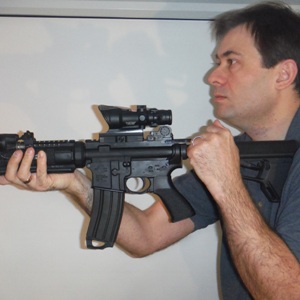
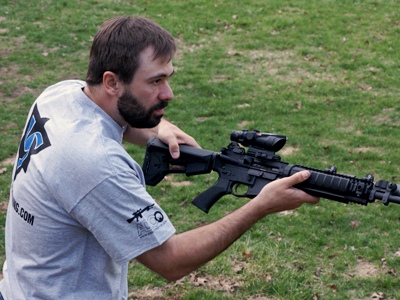
Option #2: is to run it like a righty runs an AK bolt:
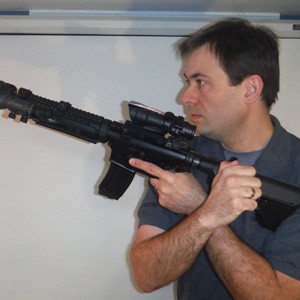
If you have one of the larger, enhanced versions, it is easier than if you have a standard charging handle. There is also a tendency to tip the ejection port skyward, which isn’t a good idea. If you have a stubborn case in the chamber you are trying to extract, this technique lacks strength. This technique can also be slow because we have to re-establish a stock and cheek weld, and although you can fire the rifle without gripping the forearm, there is a tendency to delay firing until we have reacquired a forearm grip.
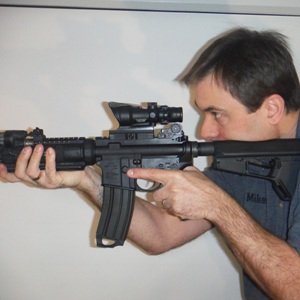
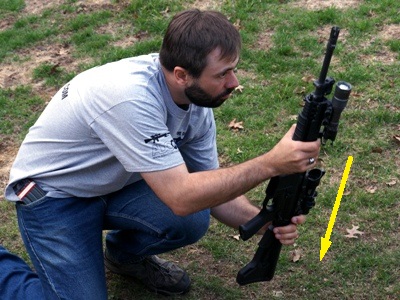
Option #3:
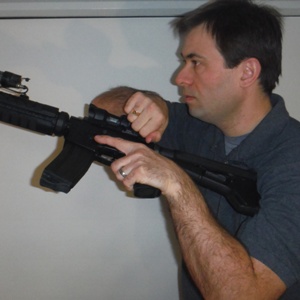

This technique, as with the previous technique, can be slow, it lacks strength and if you are using optics they tend to get in the way. The benefit of this technique over the previous technique is that it keeps the ejection port angled downward.
These are the basic functional mechanics of AR-15 style rifles, but it doesn’t end there; like any semi-automatic firearm, AR’s can sputter, cough or puke occasionally. The military teaches a malfunction clearance drill called “SPORTS” which is an acronym for:
“Slap” the magazine,
“Pull” the charging handle,
“Observe” the chamber,
“Release” the charging handle,
“Tap” the forward assist and
“Shoot,” …assuming you have a target that is still a threat.
Many credible instructors consider this flawed, primarily due to the third step; “observe.” First of all, “observe” only works when you have enough light to see the chamber. Second, and more importantly, information received by the eyes must travel a long and complex route to the visual cortex before being processed and sending that information back to the frontal, logical, “thinking” portion of the brain to make a decision. The muscles performing the pull and release action, however, perform it by a programmed algorithm that originates in the central, primitive “action” portion of the brain. We usually refer to these techniques that have become automatic, not requiring direct thought, as “muscle memory.” The commands for physical actions that begin as electrical signals in this portion of the brain occur before, and in spite of, rational thought or processing what we visually observe. Examples of this would be pulling one’s hand away from a hot stove or, more aptly, locking one’s keys in the car. The hands and arms carry out the familiar action of closing the locked car door, even though your eyes are looking at your keys sitting on the front seat. By the time you can actually decode the visual signals into logical thought, the muscles have done the deed and left you standing there thinking “that was stupid.” By that same token, the “observe” stage in SPORTS slows you down because it requires you to interrupt or delay a physical routine by attempting to process logical thought, which is asking a lot of the brain, particularly during the heightened stress dealing with a malfunction in the midst of a competition, defensive shooting, or gunfight. The same might be said of all such “diagnostic” techniques, so called because they involve diagnosing what is specifically wrong with the weapon and determining how to fix it, rather than the preferred “non-diagnostic” techniques, which basically involve a series of actions that can be performed by rote as a neuromuscular routine, in the absence of logical thought, to clear any malfunction without the need to even know what it is. The added benefit of “non-diagnostic” techniques is that, instead of using our eyes to figure out what’s wrong with our rifle, we can use them to diagnose what’s wrong with our environment, which might be kind of important.
AR’s are capable of a number of different malfunction types, which one could categorize as either simple or complex. Simple malfunctions are those such as ammunition misfires and failures to feed resulting in a “live trigger,” or “click” but no “bang.” The bolt is shut enough to allow the hammer to fall, but the rifle doesn’t fire. The response to this type of malfunction is to:
If that doesn’t work, the malfunction may be more complex such as a failure to extract (sometimes incorrectly referred to as a “double feed”), or a “V” or “wedge” which is a true double feed. If you’re having a really bad day, it may also be a “brass over bolt,” more on that later. You can get a clue as to what is going on as soon as you press the trigger because if the bolt is being held open due one of these types of malfunctions, the hammer won’t fall.
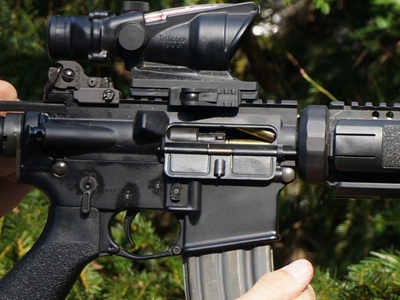
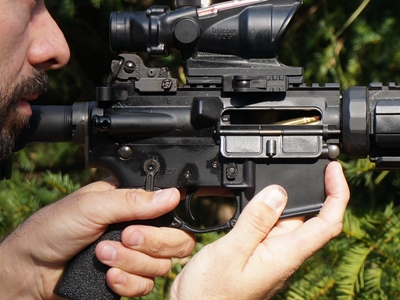
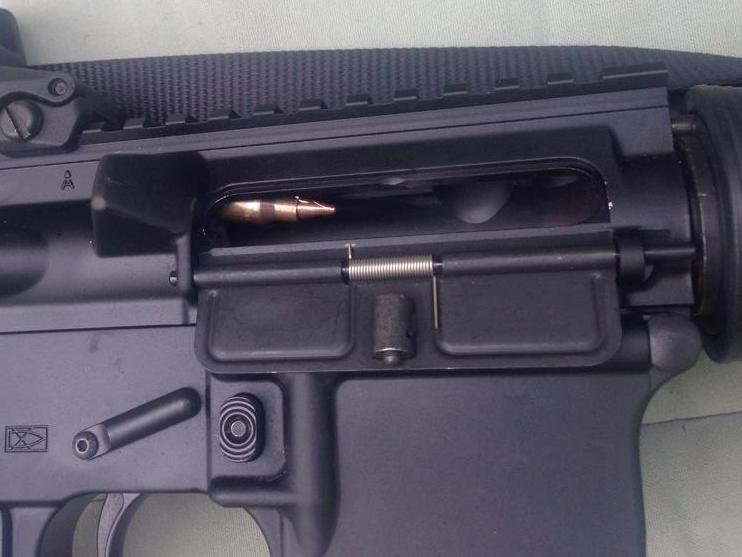
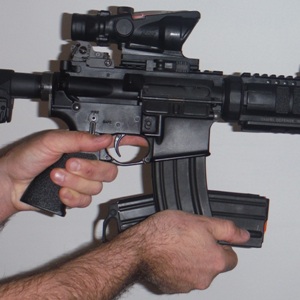
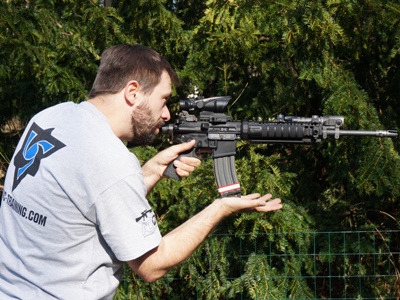
These are particularly troubling because the charging handle can neither fully retract, nor will it slam home. There is actually a very easy way for lefties to clear these:
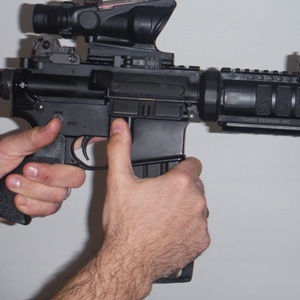
1. Extract the magazine with the right hand, then grip the magazine well and depress the bottom of the bolt catch hard, to hold the bolt in place.
2. With the left hand, “karate chop” the rear of the charging handle, which will force it forward and should force the trapped round out and allow it to fall out of the mag well.
3. Lock the bolt to the rear, manually clear any remaining obstructions from the magazine well, then remove the fingers from the bolt area and press the bolt release to close the bolt.
4. Insert a magazine and cycle the action to reload the rifle.
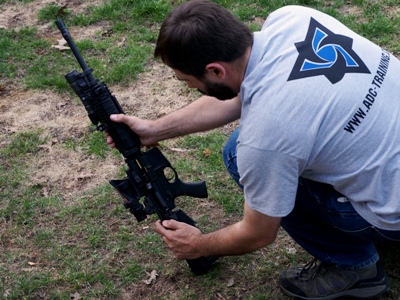
The last type of malfunction I want to address is a round or cartridge stuck in the chamber and preventing easy retraction of the charging handle. In this case, one needs to “mortar” the rifle by following these steps:
That covers the great majority of the AR-15 malfunctions that can be cleared without resorting to tools. Now: you need to practice these with an unloaded rifle, slowly, smoothly, deliberately, and repeatedly, until the motions become fluid and automatic.
*The views and opinions expressed on this website are solely those of the original authors and contributors. These views and opinions do not necessarily represent those of Spotter Up Magazine, the administrative staff, and/or any/all contributors to this site.
Brought to you by the dudes at Spotter Up


[…] Speaking of AR-15 rifles, do you know how to run one left handed? […]